It’s been a couple years since I last created an album art video, and I normally create them for an entire album all at once. It looks like the tool I used to use is no longer available, so I decided to figure out how to use Wondershare Filmora to do it.
Screenshots are from Filmora 11, but this should be pretty much the same on older and newer versions since it’s a basic operation that’s not likely to change much.
The first step is to create a new project and import the media. In addition to the .wav (or alternatively .mp3 files, though those are lower-quality), you should also have created an album art image file that is 1920×1080 pixels, the standard dimensions of an HD video. If you want to create a 4k video, you’ll need a larger image.
The first step is to drag the image to the video track.
Next drag a song to the audio track.
Now you need change the length of the video track to match the audio track. This can be tricky because the single image is too small to grab at the default zoom level. If you click “zoom in” three or four times you should be able to grab it and drag it longer.
You’ll need to drag this to match the length of your audio track. Filmora makes this easy because it wants to “snap” the video length to the audio length.
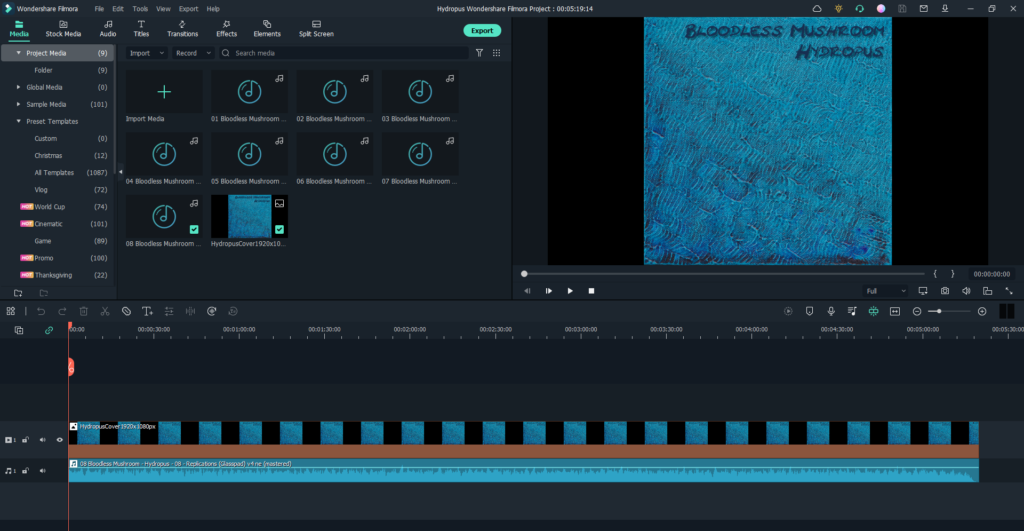
An album art project in Wondershare Filmora.
Next select Export -> Create Video from the menu. Edit the name of the video and select a folder to export to.
Under “Preset” you’ll want to click “Settings”. I have settings I’ve saved as a preset to make things faster. The video encoding bit rate isn’t very important, but you won’t want to set that too high or you’ll have a huge video file for no reason. More important is to set the audio settings to a high bit rate so you have good quality music encoding.
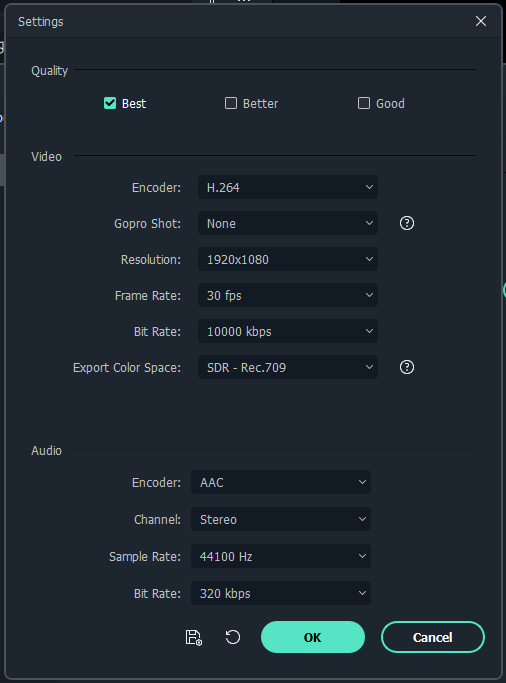
Wondershare Filmora Encoding Settings for Album Art Video
After you have the settings configured, click “Export” and wait a bit for it to finish.
You don’t need to create a new project for each video, and it’s a bunch of extra work to do so.
After the first video is exported, delete the audio track from the audio timeline, drag in the next one, drag the video track slider to match the length, and then click Export -> Create Video again. Remember to change the name. It’s that simple.